Why & How I Use Linode VPS For My Personal and Cybersecurity Projects
A Quick Guide To Setting Up A Linux Cloud Server Using (Akamai) Linode’s Virtual Private Servers (VPS)

Greetings, Cyber Mavericks!
Recently, I’ve been posting about home cybersecurity projects like the Honeypot series. To keep these projects off my home network and simplify setups, I’ve started using cloud instances more frequently.
For new projects, I quickly deploy a cloud server for a few hours, days, or months, depending on the need.
These servers are public-facing but isolated from my home and work networks for security.
To avoid repeating the setup process in future tutorials, I’ve created this guide to introduce you to one of my favorite cloud platforms for quick technical projects.
I prefer Linode over AWS and Azure for its simplicity, ease of use, and transparent pricing.
In this tutorial, I’ll set up a cloud instance for a honeypot project (T-Pot) using AlmaLinux 9 on an 8 GB RAM, 160 GB disk cloud instance.
What is Linode
Virtual Private Servers (VPS) offer a cost-effective solution for running cloud servers, with Linode being a standout choice for me personally.
Recently acquired by Akamai, Linode provides a cheap alternative to run a cloud server for an entire month starting from as little as the cost of a Starbucks coffee. ☕️

For cybersecurity professionals, hobbyists, and IT power users, this makes it an attractive option compared to managing infrastructure at home, which can incur costs for hardware, electricity, and maintenance.
Quite often, spinning up one or more Linode cloud instances is far more convenient and quicker than setting up a home lab.
Additionally, having a server online 24/7 allows you to access it from anywhere in the world, providing flexibility and convenience for your personal IT or cybersecurity projects.
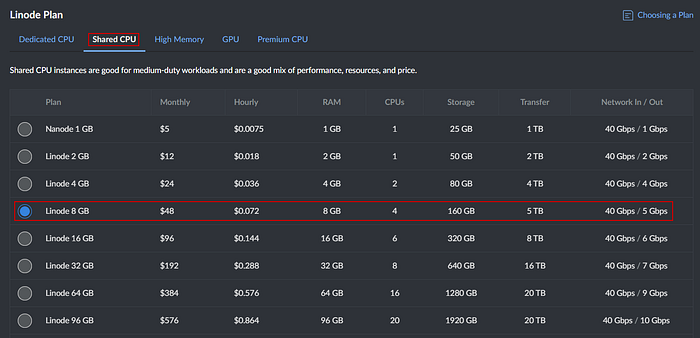
Linode offers both, Dedicated CPU and Shared CPU plans. The Shared CP plans are the most cost-effective and suitable for most of my needs.
The 1GB Nanode Plan is a great starting point, offering 1 GB of RAM, 25 GB of SSD storage, and 1 TB of transfer at the cost of $5/month, or the cost of a Venti Caramel Macchiato from Starbucks. ☕
A Caramel Macchiato brings an hour of joy, but a $5 cloud server gives you a whole month of geeky pleasure. Easy choice for me, I’ll have both, please! 😋
Okay, I am obsessed with tech and coffee as you can tell 😆
Disclaimer: This article is based on my personal experience and preference. I have not received any compensation from Akamai or Linode. I have been using Linode for over a decade and am sharing this information purely to help others with their projects and not for any promotional purposes.
Benefits
Using Linode For Personal Tech Projects
As a tech enthusiast, I have several personal uses for my Linode instances. Linode is a versatile and lean platform for such uses.
Here are some example projects I have used my Linodes for:
- Web Server: Running and learning how to configure web servers such as Apache and Nginx.
- Virtual Hosting: Learning vhosting using Virtualmin or ISPConfig with multiple domains, using multiple IPs and virtual Network Interface Cards (NICs)
- Mail Server: Setting up and running your own mail server to host emails with your own domain name with spam filtering and Anti-Virus.
- Cloud Storage: Using a portion of my storage as a drop-box to exchange data securely with friends using protocols such as SCP, SFTP or HTTPS.
- Coding: Learn and test coding skills such as coding in Python, bash scripting, and C. Having my scripts and repositories synced with a GitHub repository is a bonus.
- Web Proxy: Enhance privacy and security by routing internet traffic through my remote server. Useful for accessing geo-restricted content and anonymous browsing, and perfect for streaming regional content while travelling.
- VPN: Securely connect to my home network or browse with enhanced privacy from anywhere. Essential for encrypting data while travelling or working remotely. Never trust that Starbucks Wi-Fi!
- Testing Tools: Safely test new tools before deploying them on your main system at home or work.
- Network Reachability Testing: When I suspect network reachability issues from my location due to firewall or proxy filtering, I use my external Linode server. It allows me to test connectivity from a different host with an unrestricted internet link and a different IP address.
Using a low-spec Linode instance for multiple purposes is practical and efficient for personal projects.
⚠️ Caution: While it’s advisable to segregate functions for cybersecurity best practices, I manage temporary uses of my cloud server for personal projects carefully. I avoid storing sensitive data and prioritize secure configuration, regular updates, and firewall protection to reduce risks.
Using Linode for CyberSecurity Projects
As a cybersecurity professional, leveraging Linode for my cybersecurity projects or learning experiments offers a significant advantage: keeping these endeavours off my home network reduces the risk of inadvertently making it a target for compromise.
Below are some examples of cybersecurity projects I’ve implemented or intend to implement on my Linode cloud servers:
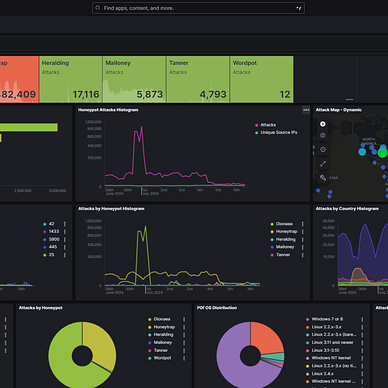
- Honeypot server: Deploying a honeypot is a fun and educational project to detect and analyze threats safely, keeping them away from your home network. 👉 See my Honeypots series 🍯 as an example project
- Out-of-band Application Security Testing (OAST): Using OAST as a replacement for Burp Suite Collaborator, focusing on non-production environments for secure testing, such as project-based webhook setups.
- C2C Server: Setting up a free and open-source command-and-control server (C2) as a valuable learning experience in cybersecurity and exploring controlled testing environments.
- Kali AttackBox: Using Kali Linux as a versatile tool for penetration testing and as an alternative to restricted platforms like TryHackMe’s AttackBox, useful in locations lacking access to dedicated pentesting tools or VMs.
- Firewall (pfSense): Implementing pfSense not only enhances network security but also serves as a valuable learning tool for cybersecurity analysts and blue teamers, providing hands-on experience in network defense.
- Log Management Server: Running an open-source SIEM or centralized syslog server for collecting, parsing, and monitoring logs offers educational insights into cybersecurity operations, preparing for more advanced SIEM deployments.
Linode Pricing
One key feature that attracts me to Linode is its transparent pricing, with fixed monthly plans or on-demand hourly rates. In Linode’s own words:
“You shouldn’t have to guess or worry about your monthly invoice. We’ve bundled CPU, transfer, storage, and RAM into one monthly cost. Choose the instance type and plan size that meets your application’s needs and start developing.”
Choose a plan and size based on your project’s needs. Plans come with fixed monthly rates or hourly on-demand options, and you can easily scale up or down.
Shared CPU plans are cost-effective for personal IT or cybersecurity projects. For business or commercial projects needing optimal performance, Dedicated CPU plans are the way to go.

Setting Up a Linode VPS
Now for the main show. Setting up a Linode VPS is straightforward:
- Linode Account: You’ll need to create a free account with Akamai Linode before you use their resources.
- Create a Linode: Log in and create a new Linode instance.
- Choose a Plan: For example, the $5/mo Nanode 1 GB Shared CPU Plan. For my current honeypot project, I needed a beefy machine so I have opted for the $48/mo Linode 8 GB Plan.
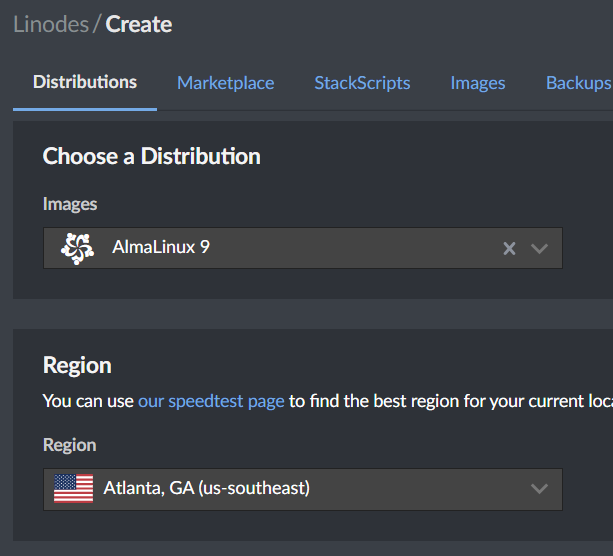
- Choose an Image: Choose from Linode’s variety of images, including popular distributions and marketplace apps. If needed, you can upload custom images. For now, choose a distro (e.g. AlmaLinux 9).
- Choose a Region: Select a region close to your location for optimal performance. You can change this later as required.
- Fill out the Linode details: Choose a descriptive Linode Label (name) and a long, complex and secure Root Password. Stay away from Greek mythology naming conventions. That’s kind of my thing :)

- Provisioning: You are now ready to provision the Linode instance and confirm the details in the summary of your Linode.
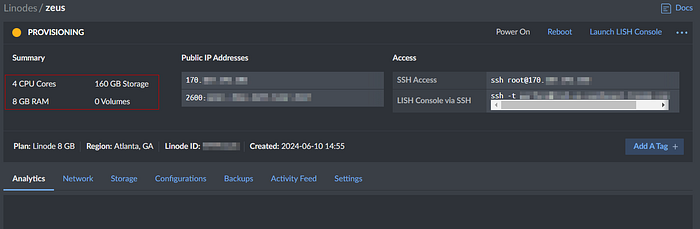
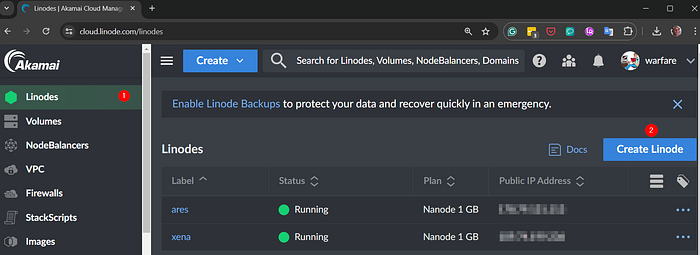
- Verify Completion: Once your Linode is fully provisioned, you can verify its status by navigating to the Linode section in the left-hand menu.

Connecting To Your Linode Server
Once your Linode server is provisioned and ready, you have several options for connecting to it. Here’s a quick overview:
LISH Console (Linode Shell)
The LISH (Linode Shell) console provides a direct connection to your Linode’s serial console.
This is essential for managing your server when SSH is unavailable due to network misconfigurations or firewall restrictions.
LISH ensures you can always manage and troubleshoot your server.
- Glish Console (Web): A graphical web-based console that is perfect for tasks requiring a GUI or troubleshooting that needs a graphical interface. Access it from your Linode dashboard by selecting your instance and clicking “Launch Lish Console”, then click “Weblish”.
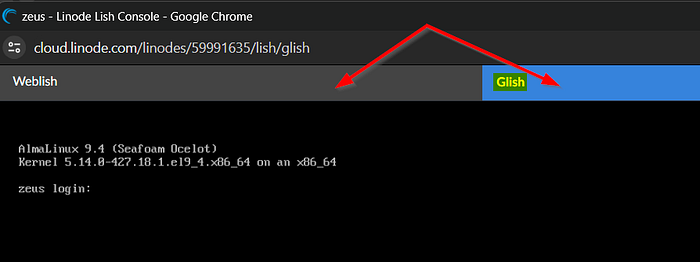
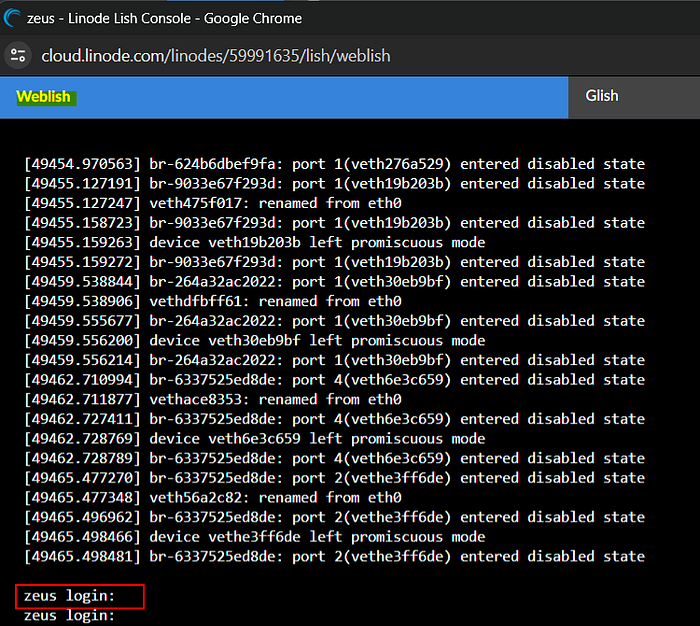
- Weblish Console (Web): A text-based web SSH client integrated into the Linode Manager. Ideal for quick, no-software-needed access. Access it from the Linode dashboard by selecting your instance and clicking “Launch Lish Console”, then click “Weblish”.
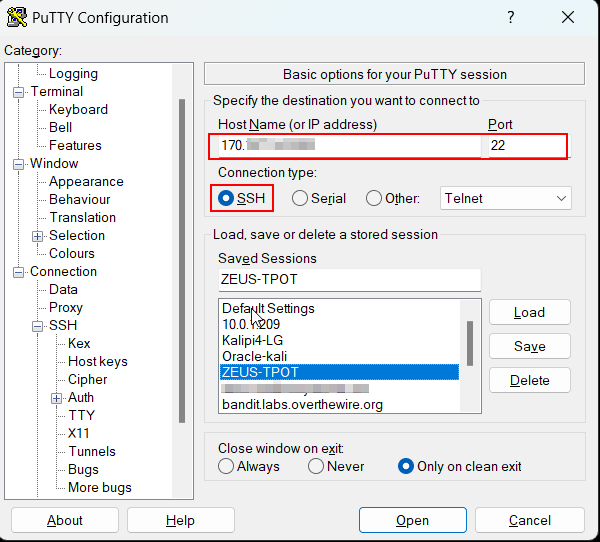
PuTTY Client (Windows)
PuTTY is a popular Windows SSH client. To connect:
- Download and install PuTTY from the official website.
- Open PuTTY and enter your Linode’s IP address in the “Host Name (or IP address)” field.
- Choose “SSH” as the Connection Type.
- Click “Open” to initiate the connection.
- Log in with your root or user credentials.
SSH Client (Linux)
For Linux users, the SSH client is typically built into the terminal and installed by default on most Linux distributions. To connect:
- Open your terminal.
- Use the SSH command:
ssh [username]@[linode_ip_address] - Enter your password when prompted.
ssh username@linode_ip_addressPost-Install Recommendations
After setting up your Linode VPS, consider the following steps to enhance the security of your freshly deployed server.
Set Up a Strong Password
Secure your root user with a strong password by changing the current one:
passwdCreate a User with Sudo Permissions
For Red Hat-based distributions such as AlmaLinux, add a user to the “wheel” group in /etc/group to grant sudo permissions.
For Debian-based systems, add the user to the “sudo” group
adduser yourusername
passwd yourusername
usermod -aG wheel yourusername
Configure SSH Key Authentication
Generate and use an SSH key pair for enhanced security. Check out my detailed guide on securing remote access using SSH keys here for more information.
Generate SSH Key Pair using either RSA or EdDSA (on the local machine):
ssh-keygen -t rsa -b 4096 -C "your_email@example.com"ssh-keygen -t ed25519 -C "your_email@example.com"Copy the Public Key to Your Linode Server:
ssh-copy-id yourusername@your_linode_ipAlternatively, manually Add the Public Key to ~/.ssh/authorized_keys:
mkdir -p /home/yourusername/.ssh
echo "your_public_key" >> /home/yourusername/.ssh/authorized_keys
chown -R yourusername:yourusername /home/yourusername/.ssh
chmod 700 /home/yourusername/.ssh
chmod 600 /home/yourusername/.ssh/authorized_keys
Change Hostname
Update your server’s hostname.
sudo hostnamectl set-hostname newhostnameRestart the systemd-hostnamed service and reboot the system to apply the changes and ensure that the new hostname is activated.
sudo systemctl restart systemd-hostnamed
sudo reboot
Update the Server
Run updates to ensure your server is up-to-date.
dnf update -yBy following these steps, you can significantly improve the security and performance of your Linode VPS.
Conclusion
Linode provides a robust, user-friendly platform for both personal and professional projects. Its simplicity, clear pricing, and responsive support make it an excellent choice for tech enthusiasts and cybersecurity professionals.
Whether you’re setting up a web server, testing security tools, or managing logs, Linode’s VPS offers a reliable and efficient solution. Give it a try and see how it can enhance your projects and skills.
By using Linode for your projects, you keep your home network safe and streamline your setup process. For new ideas or experiments, simply deploy a cloud server as needed.
With Linode’s transparent pricing and easy scaling, it’s a great choice for many of your tech and cybersecurity endeavours.
If you decide to give Linode a try, please use my referral link to support me and get yourself a free $100 credit to trial Linode resources: Linode Referral
Further Reading
I highly recommend checking out my SSH Security Guide below for securing your remote connections to your Linux server:
If you want to see a sample project I’ve used a Linode cloud instance for, take a look at my Honeypot Series below:


Thank you for your interest and for visiting my blog!
I hope you enjoyed discovering cloud instances as an extension to your home lab and cybersecurity projects to build your skills and portfolio. I hope this guide has been useful to you.
Keep exploring, keep learning, and always … keep it secure!
Happy Tinkering :)